How to run a PS/Query to a file using PeopleCode

How to run a PS/Query to a file using PeopleCode
You can invoke PS Query using PeopleCode. To do that you can use query classes in PeopleCode.
Query classes in PeopleCode can be used to create a new query, or to modify or delete an existing query. You can also use methods in the Query class to execute the query and have the result set returned as either a rowset or have it format and write the result set to a file.
Query Classes (or API) are accessible using session class/object.
These are the typical set of steps you have to follow in run time with queries.

1. Invoke the GetQuery method on the PeopleSoft session object to get a query.

Before you can open an existing query, you have to get a session object. The session controls access to the query, provides error tracing, enables you to set the runtime environment, and so on. The following lines of code check to verify that the session object is valid.

/*create a query API object*/
Local ApiObject &aRunQry;
/*create a session API object*/
Local Session &MySession;

/*The current session*/
&MySession = %Session; 
If &MySession <> Null Then 
/*The GetQuery method returns an empty query object. After you have an empty query object, you can use it to open an existing query*/
    &aRunQry= &MySession.GetQuery();
End-If;


2. Open the specific query you want using Open method.

&aRunQry.Open("MY_TEST_QUERY", True, False);

the Open method have 3 parameters of the form: Open(QueryName, Public, Update)
QueryName is the name of the specific query and it takes a string value, Second parameter specifies if the query is public or private and last parameter is required and you can say either true of false.


3. Adding runtime prompt record to the query as an instance of a PeopleCode record object (Optional)

Assume that you have already created a query using PeopleSoft Query Manager and you have define prompts for the query. In order to populate these prompt values you can use PromptRecord property to access the record instance. Then you can use this as the first input parameter for RunToFile methods.

/* Obtain the PromptRecord for the query*/
Local Record &aQryPromptRec;
&aQryPromptRec = &aRunQry.PromptRecord;

This instance of the PromptRecord can be passed to the PeopleCode Prompt function to prompt the user for the runtime values, as follows:

&nResult = Prompt(&strQryName | " Prompts", "", &aQryPromptRec);

/* Populate the runtime parameters */
If &aQryPromptRec <> Null Then
&nResult = Prompt(&strQryName | " Prompts", "", &aQryPromptRec); 
End-If;


4. Run the query to a file

You can use the RunToFile method to execute the Query and return the result to the file specified with Destination.

/* Run the query output for txt in CSV format */ 
If (&aRunQry.RunToFile(&aQryPromptRec, "c:\temp\" | &aRunQry.Name, %Query_TXT, 0) = 0) Then
   MessageBox(0, "", 0, 0, "Resultset saved into file successfully.");
Else
   MessageBox(0, "", 0, 0, "Failed to save Resultset into file.");
End-If;

You add prompt record parameters when you schedule a query using Schedule Query page (Reporting Tools, Query, Schedule Query). You can programmatically populate prompt record (QUERY_RUN_PARM) in the schedule query page and use that in your PeopleCode. This is helpful if you want to run a query using an application engine.

To do that
Step 1: Populate PS_QUERY_RUN_PARM record using app engine SQL action (say insert prompt record parameters to the PS_QUERY_RUN_PARM record)

Step 2: Then use following PeopleCode to assign prompt parameters from PS_QUERY_RUN_PARM to &aQryPromptRec (local prompt record)

&aQryPromptRec = &aRunQry.PromptRecord;
         If &aQryPromptRec <> Null Then        
            &rcdQryRunParms = CreateRecord(Record.QUERY_RUN_PARM);
            &sqlSelectQryParms = CreateSQL("%Selectall(:1) WHERE OPRID = :2 AND RUN_CNTL_ID = :3");
            
            &sqlSelectQryParms.Execute(&rcdQryRunParms, %OperatorId, MY_AET_RECORD.RUN_CNTL_ID);
            
            While &sqlSelectQryParms.Fetch(&rcdQryRunParms)
               For &i = 1 To &rcdQryPrompts.FieldCount
                  If &aQryPromptRec.GetField(&i).Name = &rcdQryRunParms.GetField(Field.FIELDNAME).Value Then
                     &aQryPromptRec.GetField(&i).Value = &rcdQryRunParms.GetField(Field.BNDVALUE).Value;
                     Break;
                  End-If;
               End-For;
            End-While;
            
         &sqlSelectQryParms.Close();
         End-If;

Step 3: Now you can use RunToFile() as follows

/* Run the query output for txt in CSV format */ 
If (&aRunQry.RunToFile(&aQryPromptRec, "c:\temp\" | &aRunQry.Name, %Query_TXT, 0) = 0) Then
   MessageBox(0, "", 0, 0, "Resultset saved into file successfully.");
Else
   MessageBox(0, "", 0, 0, "Failed to save Resultset into file.");
End-If;

How to append elements from one array to another array using PeopleCode

How to append elements from one array to another array using PeopleCode
This example is simple form of combining/appending two arrays for programetic purposes.
This is fairly straightforward example where I used PeopleCode array Push method to add item to the end of array &MYARRAY1.
If you want to add items in the beginning of the array use Unshift method instead.

/*Suppose you have two arrays as follows*/
Local Array of Number &MYARRAY1;
Local Array of Number &MYARRAY2;

/*Populate two arrays*/
&MYARRAY1 = CreateArray(100, 200, 300);
&MYARRAY2 = CreateArray(400, 500, 600);

/*append items from &MYARRAY2 to &MYARRAY1 at the end of &MYARRAY1*/
For &i = 1 To &MYARRAY2.Len
&MYARRAY1.Push(&MYARRAY2 [&i]);
End-For;

/*Printout the values for the array &MYARRAY1*/
For &j = 1 To &MYARRAY1.Len
WinMessage(&MYARRAY1 [&j]);
End-For;

/*Suppose you have array of any (any data type) like this*/
/*You can do the same thing as above*/
Local array of any &ArrayAny = CreateArrayAny(1, 2, "hi", "there");

For &k = 1 To &MYARRAY2.Len
&ArrayAny.Push(&MYARRAY2 [&k]);
End-For;

For &l = 1 To &ArrayAny.Len
WinMessage(&ArrayAny [&l]);
End-For;

How to use Autosurf Websyndic to drive Traffic to your blog/website

This is off the topic post and may related to PeopleSoft bloggers who want to flow some traffic to your blog/website.
This web site is called Websyndic.

1. First you have to register for an account on this site:  http://www.websyndic.com. Once you have registered you will get an email with an activation link to activate your user account

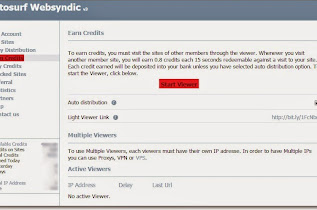
2. Once you have crated and activated Websyndic account, go to left side navigation and click Earn Credits link. Now click Start Viewer on that page. This will open a new tab in your browser and you will be automatically redirected to different web sites. This is how you we will accumulate Credit (Cash) to use WebSyndic service. This process might use lot of your internet data so it is better to use a VPS.

    3. Now you can see all the Credits you have earned in Websyndic. See the Total Credits in the following page.

    4. Now click My Sites and add your web site to WebSyndic list. WebSyndic may take a while to validate your blog/website. So here we go you can get some traffic to your blog/website this way.


    What is PeopleSoft Web Profile

    The PeopleSoft web profile contains numerous settings or configuration properties required by the PeopleSoft Internet Architecture running on the web server.

    Warning: Modifying of web profile must be handled carefully and with thorough understanding of the web profile configurations. This is a system admin task and modifying web profile properties will affect the web server configurations in your PeopleSoft system.

    Following web profiles are delivered within PeopleTools;
    • DEV - The DEV web profile provides basic portal functionality for development, including trace and debug settings that are appropriate for development.
    • TEST - The TEST web profile uses the same settings as the DEV web profile, except that fewer trace and debug properties are enabled.
    • PROD - The PROD web profile uses the settings that are most commonly needed in a production environment that authenticates users.
    • KIOSK - The KIOSK web profile uses the same settings as the PROD web profile, except that public user access is enabled for the Guest user, and all options for storing caching or persistent cookies on the browser are disabled.
    To find the web profile in your PeopleSoft system, Navigate to PeopleTools > Web Profile > Web Profile Configuration (Component name: WEB_PROFILE)

    Specifying an Initial Web Profile

    When your PeopleSoft administrator performs the PeopleSoft Internet Architecture setup procedure for your system he must be specified which web profile will be applied to the portal.
    here is an example where you specify web profile in PIA installation.

    Pages Used to Configure Web Profiles

    How to enable System Information page in PeopleSoft

    As you may already know when you press CTRL + J key combo, you can see the PeopleSoft Information Page.
    This PeopleSoft Information Page shows important information to enable users and system administrators to view such system information for orientation and troubleshooting purposes.
    These information are the database name, application server address, web server, user ID, Browser Version, Browser Platform, Tools Release, Page Name, Component Name & Menu name.
    As a practice enabling this information is a PeopleSoft system administration task. However, as developers it is good to know where to enable this system information in the your PeopleSoft system.

    To do that;
    1. Navigate to PeopleTools, Web Profile, Web Profile Configuration.
    2. Do a search and select a web profile name (in this case DEV for example).
    3. In the web profile component navigate to Debugging page and ensure that Show Connection & Sys Info checkbox is enabled.


    A typical System Information help page.
     The following is a brife discription of each item of the above page

    Useful Utility App Class (PeopleCode) Methods

    Useful Utility App Class (PeopleCode) Methods
    Sometimes we need to write our own methods or functions for data type conversions or separate certain repeated logic so that we can use them over and over again. This re-usability of code can be achieved via PeopleCode functions or using Application class methods. I personally like to use Application Classes to create these kind of common utility methods so that I can get the benefit of object-oriented programming. Below is an example of a Utility class which has few methods for data Type conversions. This class defines following methods;

    1. String to Number conversion
    2. String "YYYY-MM-DD" to date conversions
    3. String "DD-MM-YYYY" to date conversion
    4. String "YYYY-MM-DD" to Date conversion
    5. DateTime to string conversion


    /*Declare Class*/
    class MyUtil
    /* Type Conversions */
       method stringToNumber(&inString As string) Returns number;
       method stringToDate(&inString As string, &strFormat As string) Returns date;
       method stringToDateTime(&inString As string) Returns datetime;
       method datetimeToString(&inDatetime As datetime) Returns string;
    end-class
     
    /* String to Number conversion */
    method stringToNumber
       /+ &inString as String +/
       /+ Returns Number +/
       
       Return Value(&inString)
    end-method;
    
    /* String "YYYY-MM-DD" or "DD-MM-YYYY" to Date conversion */
    method stringToDate
       /+ &inString as String +/
       /+ &strFormat as String +/
       /+ Returns Date +/
       
       Local number &Year, &Month, &Day;
       Local date &date;
       
       If All(&inString) Then
       
        If &strFormat = "YYYY-MM-DD" Then
        
        &Year = Value(Substring(&inString, 1, 4));
        &Month = Value(Substring(&inString, 6, 2));
        &Day = Value(Substring(&inString, 9, 2));
        
        Return (Date3(&Year, &Month, &Day));
        End-If;
       
          If &strFormat = "DD-MM-YYYY" Then
        
        &Day = Value(Substring(&inString, 1, 2));
        &Month = Value(Substring(&inString, 4, 2));
        &Year = Value(Substring(&inString, 7, 4));
        
        Return (Date3(&Year, &Month, &Day));
        End-If;
     Else
          /* Return Null Date */
          Return &date;
       End-If;   
    end-method;
    
    /* String "YYYY-MM-DD" to DateTime conversion */
    method stringToDateTime
       /+ &inString as String +/
       /+ Returns DateTime +/
       
       Local datetime &dateT;
       
       If All(&inString) Then
          Return (DateTimeValue(&inString));
       Else
          /* Return Null Date */
          Return &dateT;
       End-If;
       
    end-method;
    
    method datetimeToString
       /+ &inDatetime as DateTime +/
       /+ Returns String +/
       
       Local string &strDatetime;
       Local datetime &nullDatetime;
       
       If &inDatetime <> &nullDatetime Then
          &strDatetime = DateTimeToLocalizedString(&inDatetime, "MM/dd/yyyy HH:mm:ss");
          &strDatetime = &strDatetime | ".000000";
          Return &strDatetime;
       Else
          /* Return Null Date */
          Return "";
       End-If;
       
    end-method;
    

    How to use MessageNumber and MessageSetNumber with ExecuteEdits

    How to use MessageNumber and MessageSetNumber with ExecuteEdits
    The ExecuteEdits method in Record Object executes the standard system edits on every field in the record. standard system edits are;
    • Reasonable Date Range (Is the date contained within the specified reasonable date range?)
    • Required fields are present
    • Validates all 1/0 fields contain only a 1 or a 0
    • Validates all translate fields have a valid value
    • Validates all YesNo fields contain a Y or an N
    • Validates all prompt edit fields have a valid value
    If any of the edits fail, which means an error has found for any field, the status of the property IsEditError is set to True for the record. Then, we can use Field class properties EditError to find out which field is in error, and MessageSetNumber and MessageNumber field class properties to find the error message set number and error message number.
    This kind of validation is useful in Application Engine programs or if you executing Component Interfaces (CI) via PeopleCode.
    One way of doing this is before you assign values to the real record (SQL record) you can create a copy of the real record as a derived/work record. Then you can invoke ExecuteEdits method with the derived record to check any standard system edits.  

    As an example;

    Function executePromptTableEdit() Returns boolean;
     Local number &msgnum, &msgset;
       Local integer &i;
       Local string &msgtxt;
       &WorkRec = CreateRecord(Record.MY_DERIVED_RECORD);
       &WorkRec.SetDefault();
       
       /* Copying like-named field values from SQL record to the derived record */
       &REC = GetRecord(RECORD.MY_SQL_RECORD);
       &REC.CopyFieldsTo(&WorkRec);
       
       /*  all system edits are executed */
       &WorkRec.ExecuteEdits();
       
       /* If edit error found */
        If &WorkRec.IsEditError Then
         For &i = 1 To &WorkRec.FieldCount
           If &WorkRec.GetField(&i).EditError Then
            &msgnum = &WorkRec.GetField(&i).MessageNumber;
            &msgset = &WorkRec.GetField(&i).MessageSetNumber;
            &msgtxt = MsgGetText(&msgset, &msgnum, "Message not found", "");
            /* here you can push this informaton to an Array and later you can use this array to populate error information to a Message Record for further lookup*/
           End-If;
         End-for;
         Return False;
        end-If; 
      Return True;  
    end-function;
    

    This way, you can use ExecuteEdit method to get the field edit error information for your next application.